


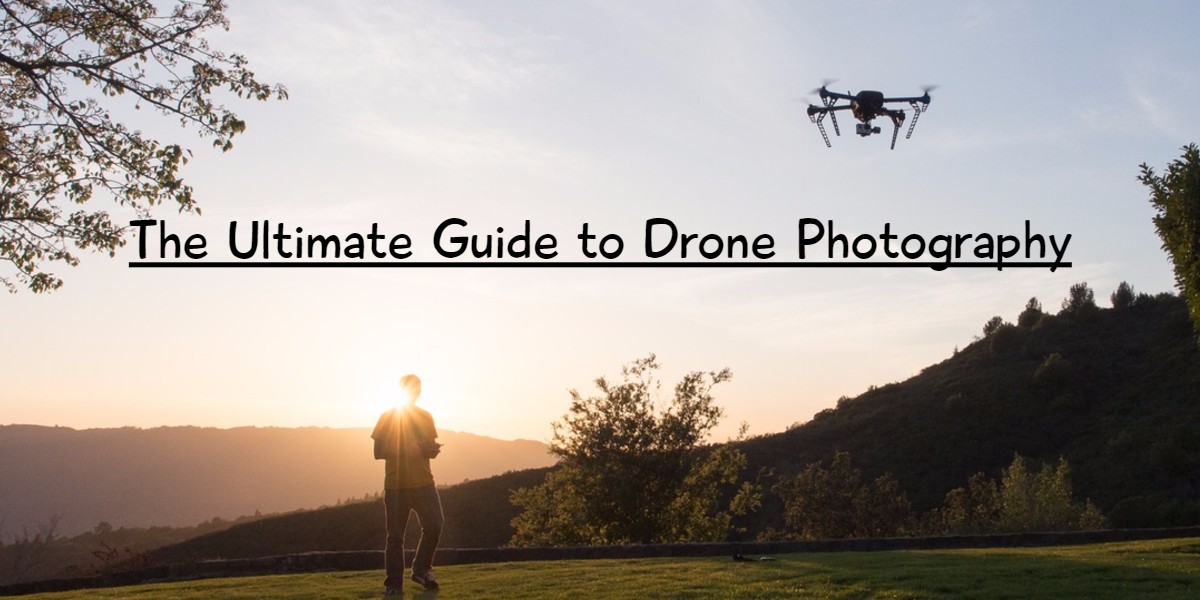
The Ultimate Guide to Drone Photography

Drones are becoming increasingly more popular. However technically the remote control multi rotor devices are not drones. They are Remote Piloted Systems, Unmanned Aerial Vehicles or Unmanned Systems, better known as the acronyms; RPS, UAV, and UAS respectively. Technically Drones are remote piloted small planes used by the military for surveillance and weapon deployment. However, the name drone seems know irrevocable linked with these smaller multi-rotor devices. But we will continue to refer to them as drones in this article.
Drones and the specific equipment such as cameras and accessories have become more and more affordable, which means now you can own, pilot, and shoot pictures and videos with your very own drone. They come in all shapes and sizes, from toy drones to professional ones used for filming breathtaking scenery for wildlife documentaries and Hollywood films alike.
In our ultimate guide to drone photography, we will cover all the main issues related to drones:
- · The types of drones and cameras you can choose from
· The specific laws and regulations
· How to learn to fly your drone
· Necessary safety precautions
· The best tips for you to increase the quality of your photographs and make the best of the experience of using a drone
Laws Surrounding Drone Flight and Usage
Many hobbyists are unaware of these rules and others simply ignore them. Drones are potentially very dangerous so please fly sensibly. They are rules set out by the CAA ( Civil Aviation Authority) that apply to all drone user even amateur users. If you wish to use your drone for commercial purposes you must pass a proficiency test and then register with the CAA and then, and only then will you be able to insure yourself against potential damage or injury. There is a set of rules for drones under 7kg and a more stringent set of rules for those over 7kgs.
If you only wish to fly for your own amusement you will still be required to fly within the CAA regulations. Many YouTube videos depicting irresponsible flying have been found by the CAA who leave comments to warn the drone owner of the breach and in some cases, owners have been prosecuted and fined.
The basic rules are:
- · You should be in control and every person or vehicle within a 50-meter radius.
· You must never fly your drone out of your direct line of sight.
· You must never fly over 400ft vertically.
However the simpler take on safe flying would be: to never fly over crowds, never fly over a road, do not directly fly near any person or animal, never drain your battery below 20% to always allow enough battery time to return your drone safely, and most importantly stay well away from airports, aerodromes or any other flying aircraft.
Types of Drones Available
Drones come in many shapes and sizes such as quadcopters, hexacopters and octacopters depending on the number of rotor arms. Furthermore, some drones may have two rotors at the end of each arm to carry larger cameras.
Apart from varying in size, features, and costs. Some of them have an integrated camera, while others require a separate camera that you have to purchase. There are a variety of options for beginners and professionals, as well as a range of different drones created for specific purposes, such as racing or shooting in particular weather conditions.
Below you can find the best drones for different categories of users, as well as according to their size, costs, and performance. We have compiled a list of the best products available for beginners and pros, so you can get an idea of what investment you should make into your gear.
What you need to remember before choosing and investing in a drone is that there are a few features you should look for: flight time, type of camera (if it is included), and the control features incorporated.
Best Drones for Beginners
The best drones for beginners are those who can take a fall without being damaged beyond repair. Your first drone should be compact, durable, and not very expensive as you are likely to crash it sooner or later. The recommended drones for a first-time pilot usually have incorporated cameras, strong frames that won’t easily break, and replaceable rotors. Here are the best options we have chosen for you to choose from if you’re just beginning your romance with aerial photography:
- · UDI U818A
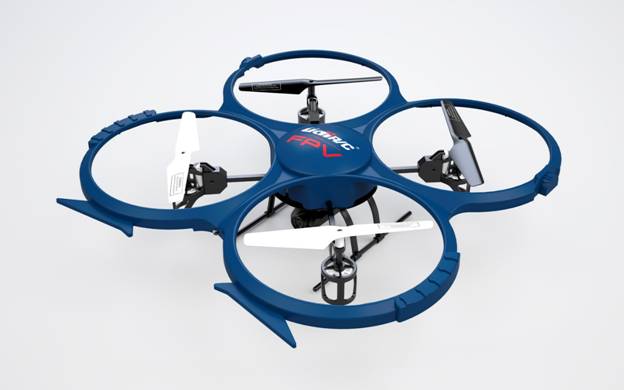
The UDI U818A is a sturdy, compact quadcopter that will offer you plenty of features for its remarkably affordable price. This medium-sized drone is easy to fly, and it has an attached 640x480 pixel video camera that will help you learn the ropes of aerial photography and video shooting. It comes equipped with four circular rotors, each protected by a plastic frame, which enables you to replace them quickly if they get damaged.
Flight time: 8 minutes
Type of camera: 0.3 megapixels, 30 fps
Control features: Remote controller
Price: £62*
· Parrot Bepop Quadcopter 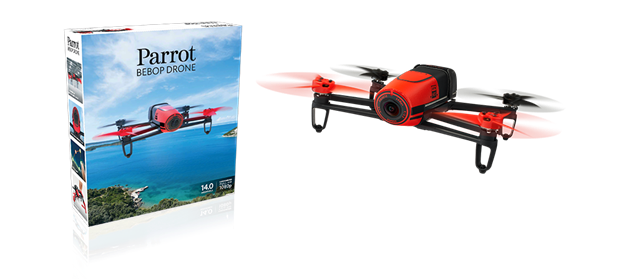
A popular product by one of the best drone manufacturers, the Parrot Bebop is a lightweight drone, easy to control and manoeuvre, which offers amazing features for its price range. It comes with an integrated camera that can take pictures and video within a stunning 180° field while remaining stable and delivering quality photo and video material. It is the go-to product for beginners who want to polish their flying skills and also experiment with the possibilities of aerial photography.
Flight time: 11 minutes
Type of camera: 14 megapixels, fisheye
Control features: Smartphone-controlled
Price: £344*
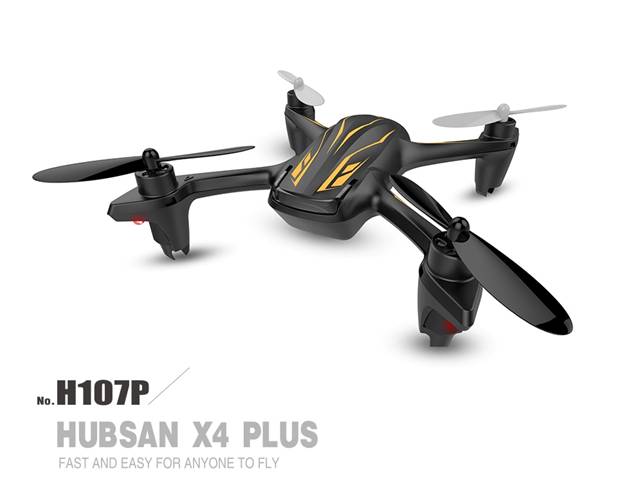
Flight time: 6 minutes
Type of camera: 720 x 240 pixels, low-resolution video
Control features: Remote controller
Price: £83*
Best Drones for Semi-Pros
· DJI Phantom 3 Standard
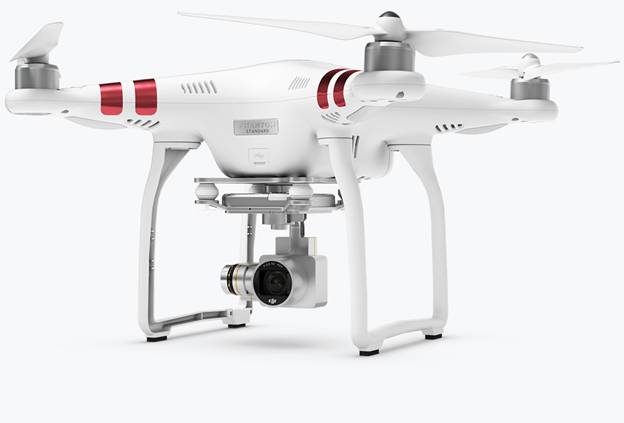
The DJI Phantom 3 Standard drone is a great investment that will help any professional aerial photographer get the best results. Created to offer high-quality photo and video material, and to provide a fun flying experience, this drone is the best option as far as price and quality go. It has an amazing 25 minutes flight time, and it comes with an inbuilt professional camera and a remote controller. This quadcopter is one of the most popular options on the market, due to its stability and easy-to-control features.
Flight time: 25 minutes
Type of camera: 12 megapixels, full HD 1080p video
Control features: Remote controller
Price: £550*
· 3D Robotics Solo Drone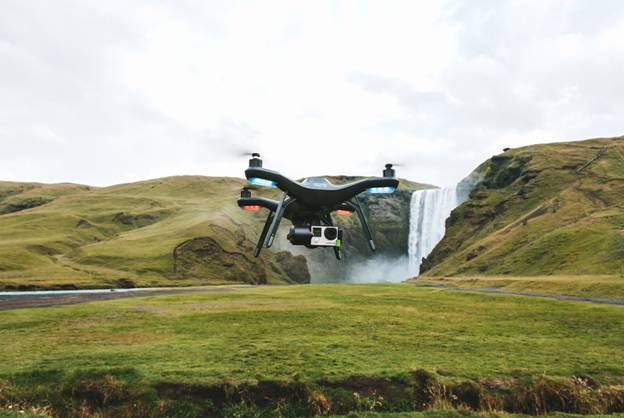
The 3D Robotics Solo Drone is a minimalist quadcopter that offers quality 3D footage, a long flight time, but it comes at a high price. Only the drone costs over $900, and if you want to get the GoPro camera and gimbal accessory, the total price will be over $1,500. If you can ignore the price, this drone is a remarkably designed and highly equipped flying device that will produce stunning aerial photographs and 3D video footage, being ideal for experienced pilots.
Flight time: 20-22 minutes
Type of camera: not included
Control features: Smartphone-controlled
Price: £639*
Choosing the Right Drone for You
When it comes to choosing the right drone for you, you need to take into account a few issues. A drone is a helpful tool that will improve the quality of your work, allowing you to take stunning aerial photographs of virtually any place you want.
It is worth noting that drones come with different features, and you should decide on what’s best for you according to the type of images or video you want to shoot.
Choosing Your Equipment, Attachments, and Accessories
An important part of getting the best results out of your flying experience is to know in what equipment, attachments and various accessories you should invest. Don’t let flashy bits and bobs take your eyes, and spend your money wisely in order to increase the performance of your drone.
· Gimbal - A good gimbal is a must have accessory because it ensures smooth stability for your camera which will provide quality footage, regardless of weather conditions. This stabiliser and the anti-vibration device can be installed on your drone, and it will reduce movement, which means your camera will stay in place, and the quality of your footage will be greatly improved. You can choose from a variety of gimbal, servo ones being the most affordable, while brushless gimbals are popular amongst professionals, as they ensure great stability throughout your flight.
· Extra batteries - As most drones come equipped with only one set of batteries that can last from 5 to a maximum of 25 minutes, you will need at least one set of extra batteries to replace the original ones. Choose them according to your drone brand and model, and you will have a few extra minutes to spend filming and photographing.
· Crash pack - Especially beginner pilots can benefit from investing in a crash pack that will protect your drone from the very likely occurrence of a damaging fall. The crash pack includes easily replaceable parts that you can use if the original ones get damaged, as well as various tools necessary for maintenance and repairing your drone. Best Camera Settings for Each Situation.
Another issue many of the aerial photography enthusiasts face is how to choose the appropriate settings for every specific situation. This problem can be easily solved if you take into account a few aspects; the most important being weather and wind conditions, the altitude of flight, and the style of image you are trying to shoot.
· Weather & Wind Conditions - The wind is the main cause of ruined footage, so avoid flying your drone on a day when the wind is over 20 mph, especially if there are heavy gusts. Most drones are supposed to work properly at up to 25-30 mph winds, but the footage or images you will obtain will be of low quality. A good rule of thumb is never to fly against the wind but to let your drone go in the same direction with the wind which will add speed and a pleasant floating effect. This, however, requires an experienced pilot who can operate the drone efficiently.
· Altitude of Flight - There are a few camera settings you should adapt to your specific altitude on the day of the shoot: shutter speed, white balance, and aperture. These are the main settings that will determine the quality of your photographs or footage, so do your research before heading out to fly.
- The shutter is the device that controls the duration of light that reaches the CCD, and shutter speed is shown as fractions of one second. For aerial photography, the ideal speed is typically between 1/100th and 1/500th of a second and it can be adapted according to the conditions. But the lower light conditions may prevent the faster shutter speeds being available unless you have control on choosing a high ISO or sensitivity for your camera. A normal ISO is around 100 and higher ISOs go up to 1,000 and above. However as the ISO increases so the image quality decreases so be aware of this issue.
- White balanceis the way your camera interprets the light colour in a scene. Different white balances result in a variety of colour shifts from blue to yellow. You can set the balance manually, or you can use custom settings adapted to the situation, such as cloudy or shady. However, daylight is generally the best setting for outside use.
- Apertureis determined by the adjustable iris of your lens, which can be closed or opened to control the amount of light that reaches the CCD. For aerial photography, the right aperture is around F8. Most cheaper drones will be automatic and not have the ability to change the aperture.
· Style of Imagery - The particular style you want your images to have will determine the camera settings, as well as the post-processing techniques you should use. For example, if you have to shoot a realistic panoramic view of the natural scenery. Most aerial photographs and videos greatly benefit from some post-processing corrections of distortions, blur, and colours, so be sure to try them out.
Learning to Fly Your Drone
Most people seem to think that drones are toys anyone can pilot, but this is not the case. Especially large, professional drones can become dangerous if someone inexperienced is trying to fly, so make sure you get enough practice with a mini-drone before you move to a more advanced one.
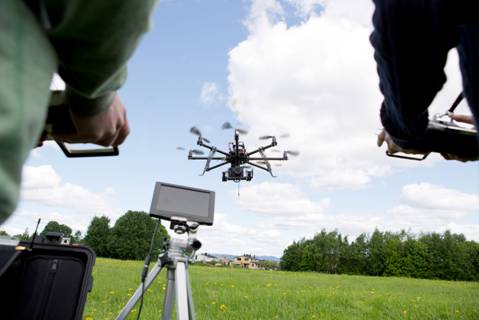
The advice most professionals give is to allow yourself to fail a few times until you get used to the specifics of flying a drone. It is normal to crash your drone in the beginning, so that is why it is recommended to begin learning on an affordable, small drone that can be replaced.
Another thing to consider is practice. You will require a lot of flying hours before you know how to control your device without endangering you or other people. Take your time to practise in your back yard before you head to the park, the mountains, or the city centre.
Even after you have gained enough experience and you feel ready to take your drone out to experiment in more challenging places, you should still be cautious. Remember that your safety and the safety of others should be your priority, so do not head out in unfavourable weather conditions, as you might destroy your drone, or even harm yourself or someone else.
Planning Your Flight Path
The key to getting spectacular aerial photos is to plan in advance. Know your route, the duration of your flight, the obstacles you might face and the weather conditions before you even take your drone out of the house. Planning your flight path in detail will help you get the extraordinary shot you are dreaming of without damaging or losing your drone in the process. Set a route with a starting and a finish point, and take into account the wind speed and the time flight of your drone to ensure that you will succeed in your quest to shoot the best aerial photographs.
Another important thing to consider is that you are not allowed to fly your drone in certain places, such as near airports or over private properties. You can be sued if you break the law, so be sure to check your local rules and regulations before you start flying your quadcopter. You can read more about specific laws and regulations in our next section.
Privacy Issues
Another concern is privacy, as more and more people acquire and use drones to shoot footage of public spaces. You are not allowed to photograph or film an individual without his or her consent which leads to a murky situation when it comes to drones. How can a drone operator that is filming a protest ask for everyone’s permission before flying his device? Well, the regulators suggest making yourself clearly visible, so that people know who the operator is and this way ensuring that they can leave if they do not want to be filmed or photographed.
Safety Precautions for Safe Flying
Here are the main precautions you should take before, during, and after your flight to ensure that you, your drone and other people stay safe.
· Do not fly in precarious weather conditions! Strong wind, rain, and snow are not your friends, and they will certainly damage your drone, which means you should avoid these weather conditions.
· Do not fly close to private properties and do not get close to people because you might violate privacy regulations and end up with a fine to pay.
· Stay away from schools, churches, stadiums, and airports!
· Be sure to register your drone if you are using it for commercial purposes.
· Do not allow children to fly the drone!
· Do not take your drone above busy highways or crowded public places!
· Use the drone in rural, scarcely populated areas and avoid trees and buildings.
· Never fly your drone beyond your line of sight.
Things to Remember When Flying Your Drone
We know you are anxious to try your new drone and see what it can do, but it is important to always keep in mind a set of important rules to ensure that your flight is a pleasure and not a headache.
· Your drone is not a toy, so be responsible and use it only in permitted areas!
· Every drone is different, so practice before you take yours out for a spin, even if you have piloted another before. They do not fly, work, or move the same!
· Respect people’s privacy and never lower your drone to photograph or film them up close.
· Be aware of laws and regulations and carry your permits with you wherever you are flying the drone.
· Be careful if you want to use the drone inside or in confined spaces.
· Do not go over the specified altitude recommended for your drone.
· Do not allow inexperienced friends to try flying the drone, as this reckless behaviour might lead to accidents.
Choosing The Best Angle for Your Pictures
As with traditional photography, the best angle varies depending on the subject, the feeling you are trying to convey, and the specific taste of every photographer. However, aerial photography enables you to shoot previously inaccessible views from overhead, which can make for some impressive and original results. There are no specific rules to follow to make sure that you are getting the best angle for your picture because the best angle changes from an instant to another. You can, however, learn a few simple tricks that will help you decide correctly in each situation and choose the most spectacular angle possible.
· Steeper angles make for less conventional photographs - The steeper the angle you choose, the less conventional your result will be, so try to opt for tilted angles instead of regular ones. You can achieve this effect by having your drone positioned on its side, instead of in direct line to the horizon. Experiment with the movements of your drone and you will see the difference!
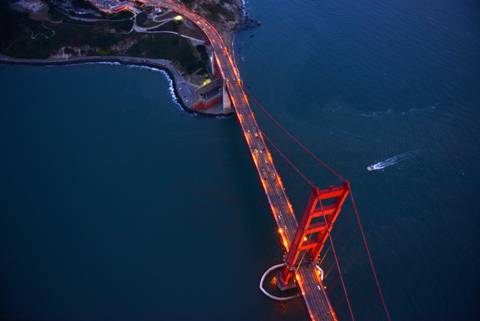
· Taking a photo straight down creates an original, flat perspective - Try photographing geometrical, flat shapes like fields or sports courts from a 90-degree angle, this way you will obtain an original, spectacular perspective. Think about the terrain you are photographing and adjust your angle to the specific requirements of every situation. After you get more experience flying your drone, it will become easier for you to experiment and explore the possibilities of aerial photography.
Tips for Taking the Best Possible Pictures
As it was already mentioned, the best possible pictures you can take with your drone are those that mix quality with creativity. When it comes to drone photography, the sky is literally the limit, so invest in some quality gear that will allow you to explore all the possibilities of this remarkable medium.
Start by practising and perfecting your flying skills, and then move on to discovering what your drone can do and how you can adapt the camera setting for every situation you face. Below, you can find some pro tips that apply to both beginners and professional drone operators that will ease the process of getting the best results with your drone.
· Choose a great location – The key to great aerial photography that will take your breath away is getting to a stunning location that will transfer well into your photographs.
· Reduce vibration – To avoid blurry, hazy, low-quality photographs you must reduce and even eliminate vibration, which you can achieve by using a special device and developing a steady hand when controlling your drone.
· Avoid obscuring elements – Your flying time can be ruined by obscuring features, such as buildings and trees, so make sure you shoot in a plain, clear space, as sparsely populated as possible.
· Be careful with the shadow produced by your drone – Always be aware of your drone’s position in relation to the sun to make sure that the shadow produced by your equipment is out of the shot.
· Buy a good gimbal – As it was already mentioned, a good gimbal is a life saver for any drone photographer as it spares you the trouble of worrying about shaky, vibration-affected photographs.
· Shoot different angles – A great tip, especially if you’re a beginner, is to shoot various angles of the same subject to get a grasp of what effect your movement produces on the resulting image.
· Invest in a powerful camera – This goes without saying, but a powerful, high-quality camera will help you along the way, and you should definitely invest in a top notch product if you want to get great aerial photographs.
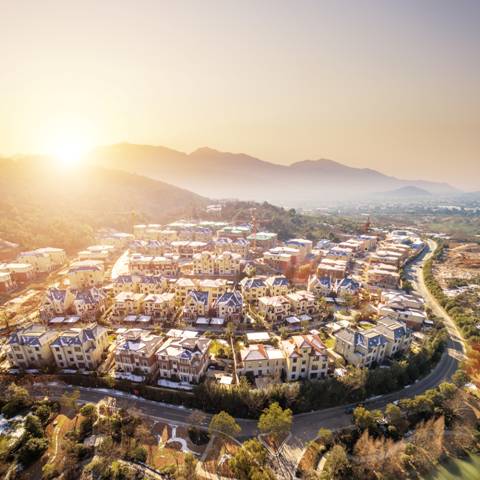
Examples of Breathtaking Aerial Footage
Both aerial photography and video materials have produced stunning results that surprise and amaze the viewer. The previously inaccessible perspective mixed with the surprising camera angles have a lasting impact on the audience, and there are professionals who have created amazing content. Becoming professional in this particular field takes time and money, but it is a challenging road worth taking if you feel passionate about aerial photography and footage. The effort you put into acquiring your gear, developing your skills and constantly learning about how to improve your abilities will eventually pay off. You will be able to produce stunning material that will impress and move people, regardless of the field you work in, be it advertising, cinema, or photography.
If you need some inspiration or if you want to see what amazing results you can achieve with your new drone, here are a few samples of breathtaking aerial footage. These short examples will truly prove that there is no limit when it comes to the possibility of aerial photography, and it is just a matter of time until you can achieve the same performance. 
Deer Park
General Showreel
Atlanta Footage (Real Estate)
Iceland Footage
Dolphins and Whales Footage
After you have read our ultimate guide to drone photography, all you have to do now is apply your knowledge, skills and talents to your work, and get ready to produce your own masterpiece. Keep in mind that all the necessary skills for becoming a professional aerial photographer can be developed through practice, so stay focused and patient.
All professionals stay connected to the latest discoveries and technologies that appear, so make sure you keep an eye open for new ways to improve your gear. Another important thing to remember is to have fun while flying your drone, so take your time to enjoy the experience! Be proud of your results and you will see that your abilities will quickly improve if you practice as often as you can.
Take your drone to amazing, beautiful locations and use it to shoot stunning photographs that will display a unique, unconventional view that we couldn’t access before aerial photography became mainstream.
Follow our ultimate guide to drone photography and respect rules and regulations to ensure your safety and that of those around you. After you make sure you can properly manoeuvre and control your drone, there is no limit to what you can achieve!